If you’ve done painting projects in your home before, then you know how frustrating it can be to finish up, peel the tape off, and see that splotch of color where it doesn’t belong. It takes a lot of time and, all too often, a lot of cleanup to paint even a small bedroom! So, what’s the secret to making a complicated job like this worth the effort?
We’ve been in this business a long time, and we can help you avoid those common painting mistakes that make you want to tear your hair out. Let’s start with what NOT to do …
What to Avoid if You Want to Paint Like a Pro:
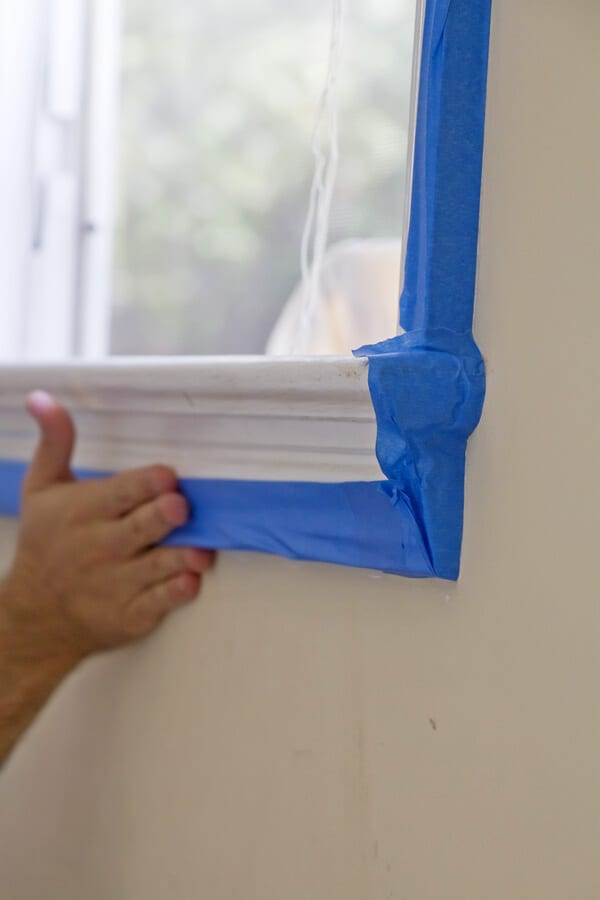
1. Skipping the Prep Work.
Putting tape around the baseboards is annoying, isn’t it? Buying an extra drop cloth, cleaning and patching the walls, removing curtain brackets and light switchplates … isn’t it all a waste of time?
We believe that if a job is worth doing, it’s worth doing right. Professionals spend most of their time doing prep work so that the job is completed smoothly, cleanly, and on time. Follow their lead and spend some extra time on the front end so that you don’t have to sponge off mistakes on the back end. Wash your walls ahead of time and make sure they’re free of debris before you paint. Use premium painter’s tape to avoid seepage. Finally, cover or remove anything you don’t want dripped on while you do the work.
2. Going cheap on the brushes.
There are so many kinds, and they’re all so expensive. You’ve already bought premium paint; why not save a little money on the brushes?
In reality, the quality of the brush matters. Painting professionals agree: The applicators matter just as much as the application. Better brushes and rollers mean better coverage, which can actually help you save money on paint. Not only that, but quality brushes will last longer as long as they’re cared for properly.
3. Skipping the Primer.
If your paint is good, it should be good enough! Primer adds a step and costs more money. It’s a time-waster that just isn’t worth it.
Primer actually gives you a smoother finish while also covering other flaws on your painting surface. Don’t skip this vital step, especially if you’re painting on a less-than-perfect surface! If you’re concerned about time or money, pick up a two-in-one paint and primer.
4. Paying No Attention to the Type of Paint Needed for the Job.
Matte, Semi-gloss, Gloss … they’re just words. Surely they don’t make the difference interior designers say they do.
As you can probably guess, these labels do make a difference. For instance, you wouldn’t want to use flat paint in a high-traffic area. Soon, that lovely color would be smudged, scuffed, and scraped. It’s better to use washable satin or semi-gloss paint. There are other paint recommendations out there, depending on the look you want your room to have. Also, be sure to apply your paint the way the manufacturer suggests.
5. Dunking the Brush with Every Dip.
That’s right. Dunk it. The more brush on the paint, the better it will cover the walls! That makes sense, doesn’t it?
No. You don’t want or need globs of paint deep in your brush bristles. Dip your brush in just a third of the way. This will help you avoid wasting paint and making a huge mess.
Here are the Real Tips from the Real Painting Pros.
Now that we’ve covered what not to do, let’s cover a few of the extra tips and tricks that can help you paint like a pro.
- Timing is important. Once the primer dries, you’ll want to add your top coat within 24 hours. That’s when the surface is the stickiest. But don’t rush ahead! If you don’t allow a first coat to dry completely before brushing on more paint, you can ruin a good paint job. When in doubt, check the instructions on the can of paint. Also, be sure to remove painter’s tape two or three hours after you’ve completed your final coat. If you leave tape on for too long, it can remove some fresh paint with it.
- Are you left with an inch of paint at the bottom of the gallon? Although it’s tempting to simply pop the top on and put it on an upper shelf in your garage (where it will dry out), do this instead: Put clear plastic wrap directly on the leftover paint, and then reseal the can. This will keep that leftover paint from drying out.
- Put paintbrushes in a plastic sandwich bag when you take a break! If you wrap them up and pop them in the fridge, they won’t dry out overnight. You can even freeze them for longer storage. When your job is completely finished, take the time to clean your brushes thoroughly. They can last for years if you care for them correctly.
Count on SNL Painting Inc. for your Painting Needs.
If you’d like a partner in the painting process, you can always call SNL Painting Inc. We offer courteous, professional services and we love making a client’s home feel like new. Let us know if you have questions or if you need a quote!